REVIEW · PHOTOGRAPHY SESSIONS
Lisbon Photography Masterclass – Private Photography Lesson
Book on Viator →Operated by Aperture Tours · Bookable on Viator
Lisbon turns into an open-air photo studio. This private photography masterclass pairs a local route with a professional photographer so you can learn what to shoot and how to make it work with your own camera, step by step. You’ll move through classic photo neighborhoods while practicing basics you can use instantly back home.
I love that the focus is on taking better travel photos, not just sightseeing. You’ll get practical guidance for city shots, from viewpoints to street scenes in Alfama, plus creativity prompts that fit both beginners and more experienced hobbyists. One thing to consider: you’ll want to think ahead about your tripod setup (especially adapters), since gear compatibility can affect low-light results.
In This Review
- Key points before you go
- Lisbon’s photo advantage: why this route makes sense
- Price and value: what you’re really paying for
- Where it starts: the Portas do Sol meeting vibe
- Alfama: practicing street photography in Lisbon’s oldest layers
- Portas do Sol: a quick shift from streets to a city-wide view
- Miradouro da Graça (Sophia de Mello Breyner Andresen): learning to frame the horizon
- Miradouro da Senhora do Monte and Miradouro São Pedro de Alcântara: multiple viewpoints, different lessons
- Elevador da Gloria and Bairro Alto: motion, geometry, and layered Lisbon
- Lisbon Cathedral: finishing with a landmark you can compose your way
- The photography skills you’ll actually use back home
- Gear reality check: cameras and tripods need a plan
- Weather, pace, and what to wear
- Who this masterclass suits best
- Should you book it?
- FAQ
- What language is the Lisbon Photography Masterclass taught in?
- How long is the private photography lesson in Lisbon?
- Is this a private tour or a shared group?
- Do I need to bring a camera?
- Can I rent a tripod for the lesson?
- What stops are included during the photo walk?
- Does the tour run in bad weather?
Key points before you go
- Private, hands-on instruction with a professional photographer guide in English
- A tight 3-hour route built around Lisbon’s viewpoints and old-city angles
- Real photo practice in places like Alfama, Portas do Sol, and several miradouros
- Camera-friendly teaching for city scenes, people watching, and landmark photos
- Tripod rental available, but plan for adapter needs if you use your own system
- Operates in all weather with smart clothing choices to keep the lesson going
Lisbon’s photo advantage: why this route makes sense
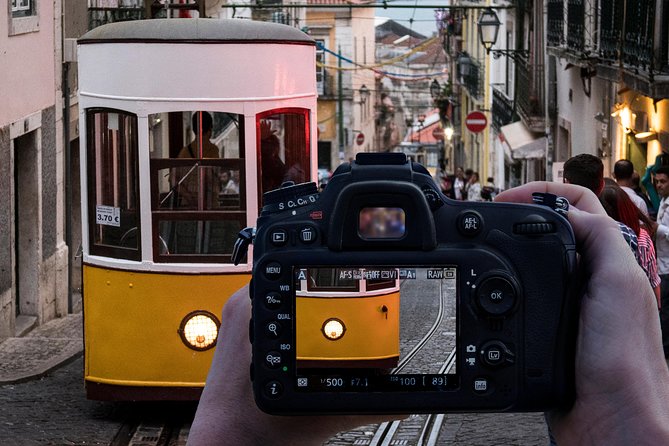
Lisbon is all angles, light, and color—perfect for learning photography fast. In just a few hours you get narrow alleys, pastel walls, tiled details, and a string of lookout points where the city spreads out below you. This matters because photography isn’t only about where you stand. It’s about timing, perspective, and choosing the right settings for the kind of scene in front of you.
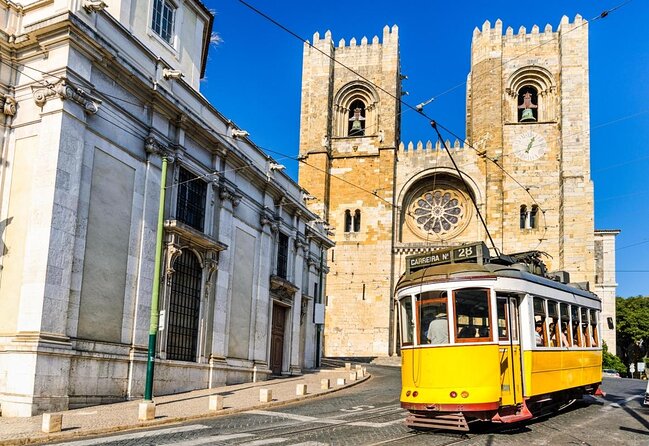
What I like about this masterclass is that it’s built around the kind of pictures you actually want from Lisbon: tram views, rooftops, framed street compositions, and people + place moments. Instead of stopping and hoping you’ll get lucky, you’ll be taught how to look for a shot—then how to make it happen with your camera.
You’ll also cover different “types” of light. Lisbon can shift quickly between bright street glare and softer shade under viewpoints and terraces. That variety is great for learning, because it forces you to practice the basics in realistic conditions.
You can also read our reviews of more private tours in Lisbon
Price and value: what you’re really paying for
At $177.44 per person for about three hours, you’re paying for two things that are hard to replicate on your own: expert guidance and time efficiency. A typical self-guided day in Lisbon can be great for photos, but you’ll waste energy figuring out framing and settings without a coach.
This experience includes a local guide plus a professional photographer guide, and it’s private for your group. That combination is where the value shows up: you’re not just getting access to photo spots—you’re getting instruction tailored to the scenes you’re standing in. If you’re a beginner, you’ll get structure. If you’re already a hobbyist, you’ll still benefit from having someone point out what to prioritize (focus, exposure, composition, and viewpoint choices) in real time.
The “camera not included” detail is worth noting. If you’re planning to learn with your own gear, great. If you’re hoping someone supplies equipment, you’ll be disappointed. On the other hand, a tripod is available to rent, which helps if you’re focused on low-light or long-exposure work.
Where it starts: the Portas do Sol meeting vibe
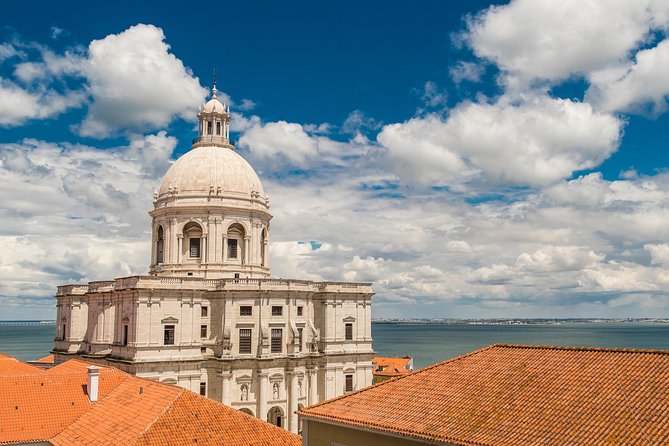
Your lesson begins at SOL Restaurante e Jardim, in the area of Largo das Portas do Sol (Beco de Santa Helena). That’s a smart starting point because you’re already near one of the classic Lisbon panoramas. It helps you get oriented quickly—both with the city and with your camera.
Expect a short transition from meet-up to first shooting moments. You’ll want to arrive with your camera ready and charged. If you have multiple lenses, think about whether you’ll actually use them during a three-hour walk—this is not the kind of tour where you want to keep changing systems.
The route also ends back near the start. That keeps the logistics simple, especially if you’re combining this with other Lisbon plans.
Alfama: practicing street photography in Lisbon’s oldest layers
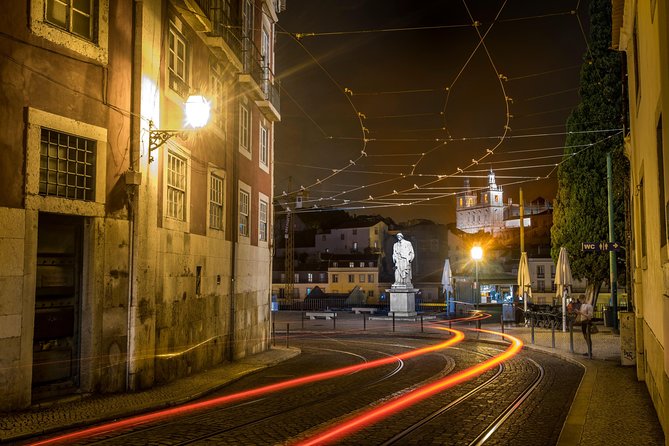
Alfama is the section of Lisbon that feels like it was built to be photographed. It’s tight, it’s textured, and it’s full of small visual wins: doorways, tiled walls, street corners, and the kind of everyday human moments that make travel photos feel alive.
This is also where you’ll get most of the “how to shoot the city” education. City photography is tricky because the subject is never perfectly isolated. You’re often balancing:
- bright surfaces against darker streets
- moving people against static backgrounds
- lots of visual clutter in the frame
A good photographer guide can teach you how to slow down your choices. You’ll learn to frame with the street as a leading line, to place buildings as layers in the background, and to watch how light falls across the alley. Even if you’re not chasing a technical masterpiece, you’ll come away with images that look intentional instead of random.
One practical bonus: Alfama is a place where people will naturally look up, pause, and move. That gives you chances to practice shooting people watching without feeling like you’re interrupting the scene. It’s also a great area to practice focus decisions—what you want sharp and what you’re okay with softly blended.
Portas do Sol: a quick shift from streets to a city-wide view
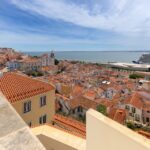
From Alfama, you’ll work your way toward Portas do Sol—one of the places where you can capture Lisbon as a whole. This stop is valuable because it changes the photographic problem.
Instead of tiny details, you’re dealing with scale. Panoramic city photos push you to think about:
- horizon placement
- exposure balance across sky and rooftops
- wide-angle distortion and composition
You’ll likely spend time setting up a shot before you click. That’s part of the lesson. A professional guide can help you decide which composition will photograph better, even if it doesn’t look “perfect” to the eye in the moment.
If you’re learning, this is also where you can practice switching modes: for example, using settings that let you control highlights without losing the detail in the buildings. It’s a great chance to test your camera’s behavior across bright light.
You can also read our reviews of more photography tours in Lisbon


Miradouro da Graça (Sophia de Mello Breyner Andresen): learning to frame the horizon
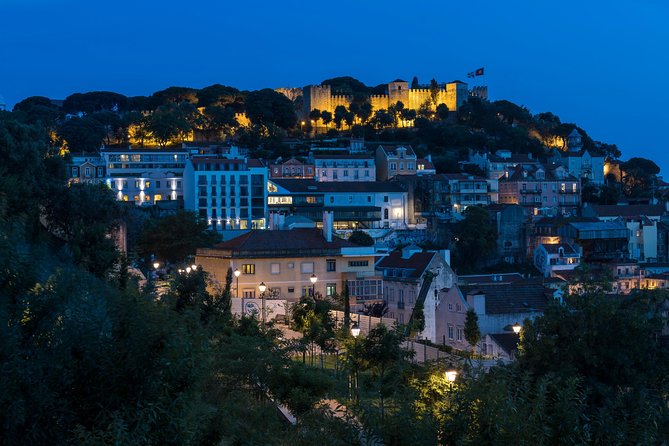
Next comes Miradouro da Graça, the one named for Sophia de Mello Breyner Andresen. Miradouros are basically Lisbon’s photography classrooms. They teach you how to work with elevation, how to include enough context without shrinking your subject, and how to avoid ugly empty space.
At this point in the route, you’re building a “photo sequence.” The goal is not just one stunning shot. It’s a set of images that feel connected. You can think about:
- close-to-you layers (foreground texture)
- mid-ground buildings
- long-distance city edges
You’ll also get practice planning for the sky. In Lisbon, sky can become either your friend or your enemy depending on cloud cover and the time of day. A guide can help you choose whether to let the sky dominate or to treat it as supporting context.
This stop is also a good place to practice steady shooting technique. Even if you don’t need it for daytime, learning steady habits here helps if you continue into lower-light conditions later.
Miradouro da Senhora do Monte and Miradouro São Pedro de Alcântara: multiple viewpoints, different lessons
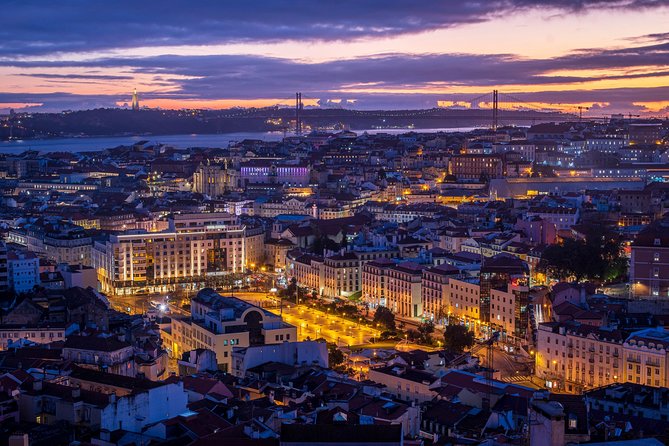
You’ll move through two more lookout points: Miradouro da Senhora do Monte and Miradouro São Pedro de Alcântara. These aren’t just “more great views.” They’re different compositions from different angles, and each angle teaches you something new.
Here’s how you can use these miradouros for maximum learning:
- Compare foreground choices: what looks best when there’s a railing, steps, or nearby buildings?
- Watch the direction of light: you’ll get different brightness on façades and rooftops.
- Practice simplifying the scene: a viewpoint can overwhelm your frame if you don’t choose one clear compositional idea.
If you’re someone who struggles to make city photos look “like postcards,” this is where you start getting it. You don’t need a special camera. You need a clear decision about what the viewer should notice first.
Also, if you’re working with a lens that’s slightly wider, these stops can help you practice controlling edge distortion. The guide can suggest how to position yourself so the photo doesn’t look stretched or tilted unless that’s your intention.
Elevador da Gloria and Bairro Alto: motion, geometry, and layered Lisbon
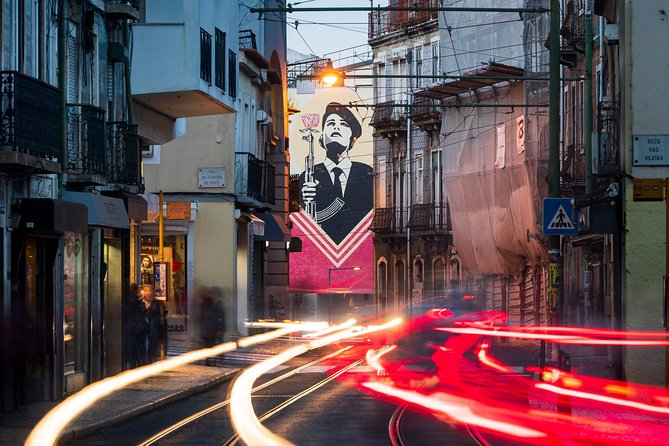
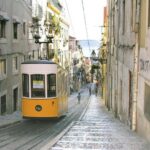
From the miradouros, the lesson shifts into Lisbon’s vertical personality via Elevador da Gloria, and then into Bairro Alto. This part of the route is important because the city stops being only about panoramas. You get more movement and more structural lines.
Elevators and streets bring a different challenge: capturing motion and creating structure. You might be experimenting with shutter speed choices to either freeze activity or gently blur it. Even in daylight, motion practice makes your future night photos easier because you understand what changing shutter speed actually does to your frame.
Bairro Alto adds another layer: streets that encourage you to look for symmetry, repeated shapes, and windows that help you build depth. It’s also a good setting for city portraits and “place + person” shots, because there’s plenty of background context without everything being too distant.
This portion of the tour is also where you can put your learning into a practical rhythm: find a composition, set the shot, and make small adjustments rather than constantly restarting.
Lisbon Cathedral: finishing with a landmark you can compose your way
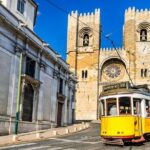
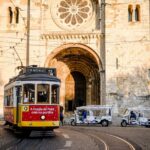
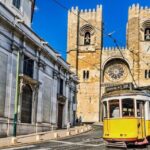
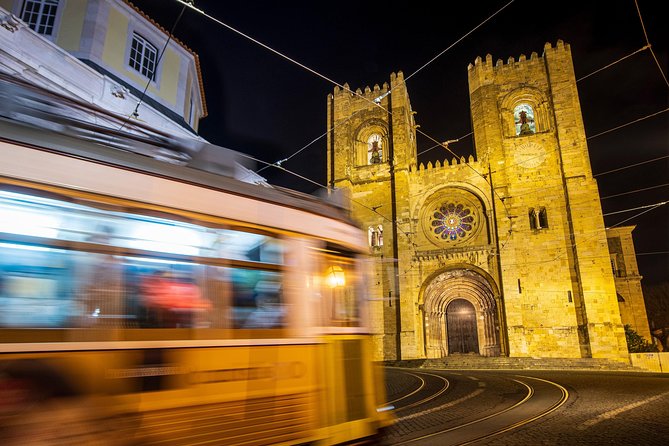
You’ll end the route with Lisbon Cathedral. Landmark stops are useful in a photography lesson because they force you to translate what you practiced into a “hero shot.” A cathedral gives you lots to work with—façade lines, arches, and angles that can look great from slightly different positions.
The key is to avoid photographing it like a checklist item. Instead, use the skills you’ve practiced:
- include something human-scale nearby
- frame with leading lines or towers as vertical anchors
- decide whether you want the sky to frame the building or to stay out of the way
If you’ve been working with composition all morning, the cathedral should feel like a satisfying final assignment rather than just another stop.
The photography skills you’ll actually use back home
The lesson is a private, personalized experience designed to fit where you are with photography—starting out, hobby-level, or more experienced. The structure is built around learning how to handle camera complexity without feeling overwhelmed.
Here are the kinds of skills this lesson is meant to develop:
- Camera settings for city light (bright streets, shaded courtyards, and view-point skies)
- Composition basics for travel photos (layering, framing, and clean subject focus)
- Creativity prompts so you’re not stuck shooting only wide panoramas
- Practical city shooting habits, like thinking before you raise the camera
I also like that it’s designed for people who want more than monuments. You’ll get chances for landmarks, but also for people watching and everyday moments. That’s what makes your Lisbon photos feel like a real trip rather than a folder of similar angles.
Gear reality check: cameras and tripods need a plan
Two details matter here. First: you’ll need to bring your own camera. Second: a tripod is available to rent, but the lesson can still work without one.
If you do plan to use a tripod, here’s the practical warning I’d give you: make sure your setup is compatible with standard systems. In one case, a tripod rental had a missing adapter compatibility issue, and it limited long-exposure shooting. The fix wasn’t impossible, but it was inconvenient enough to affect results. The lesson guide did offer creative help, like offering to help with transferring cards, but that’s not a substitute for having your own hardware working smoothly.
My advice is simple:
- If you’re bringing a tripod, check your adapter type ahead of time.
- If you’re relying on long exposures, test your setup before the start of the tour.
- If you have specialized plates or brackets, message the operator in advance if you can. Planning beats troubleshooting.
Also, remember this is a walking route. A tripod is helpful, but you don’t want gear that slows you down or turns every stop into assembly time. The best shots usually come from balance: steady when needed, flexible when not.
Weather, pace, and what to wear
This experience runs in all weather conditions, so you’ll need to dress for the day rather than assume sunshine. Lisbon light is beautiful, but wind and shifting clouds happen, especially near viewpoints. Wear shoes that handle uneven or steep streets comfortably.
The pace is active, and the value of the tour depends on not rushing ahead. Try to stay with your guide so you can replicate the framing and camera choices they’re teaching.
Since it’s operated in English and is a private experience, you can also ask questions as you go. If something isn’t working—exposure, focus, or framing—this is the time to adjust rather than waiting until you’re back in your hotel.
Who this masterclass suits best
This is a strong fit if you:
- want a guided route through Alfama and multiple miradouros without guesswork
- are learning photography basics and want instruction where the lesson is happening
- want your photos to look more intentional—especially city streets and viewpoint compositions
- prefer a private experience where your guide can steer you toward shots that match your interests
It also works for more experienced photographers, because you can use the stops to refine creative decisions: shutter speed choices, compositional layering, and how to handle bright city contrast.
If you’re extremely gear-focused and expecting a deep studio-style workshop, you might find the outdoors approach more practical than theoretical. But for travel photography, that’s usually a good thing.
Should you book it?
Book it if you want your Lisbon photos to improve in a measurable way over a short time. The route makes sense for learning, and having a pro photographer guide you through Alfama, Portas do Sol, several miradouros, Elevador da Gloria, Bairro Alto, and Lisbon Cathedral is the kind of structure most people never create for themselves on a DIY day.
Skip it (or plan carefully) if you’re depending on a very specific tripod setup and you can’t verify adapter compatibility beforehand. Gear friction can drain focus, and this tour is most enjoyable when you’re free to concentrate on composition and camera choices.
FAQ
What language is the Lisbon Photography Masterclass taught in?
The lesson is offered in English.
How long is the private photography lesson in Lisbon?
The experience lasts about 3 hours.
Is this a private tour or a shared group?
It’s private. Only your group participates.
Do I need to bring a camera?
Yes. A camera is not included.
Can I rent a tripod for the lesson?
Yes. Tripods are available to rent.
What stops are included during the photo walk?
You’ll photograph areas including Alfama, Portas do Sol, Miradouro da Graça (Sophia de Mello Breyner Andresen), Miradouro da Senhora do Monte, Miradouro São Pedro de Alcântara, Elevador da Gloria, Bairro Alto, and Lisbon Cathedral.
Does the tour run in bad weather?
Yes, it operates in all weather conditions, so dress appropriately for the conditions.